TOP 10 Photoshop Shortcuts Key Most Help
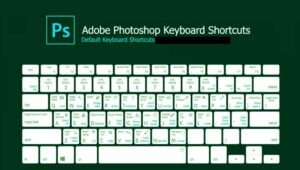
Photoshop key command shortcut:Key Command Shortcuts are Usually a Little differents Between Mac and PC (Windows) as each system has a slightly different keyboard number 10.
When you have a tool selected,
You can quickly switch between the free-hand
tool by holding space.
You hold the space bar and use the left side of the mouse to move
around. our clipping path services company top shortcut used
Number 9.
To save you some time,
you can quickly switch between the
colour swatch by pressing X on your keyboard and this will swap over the colours which are selected.
These are the two colors at the bottom left of the screen on the tool bar. our clipping path services company top shortcut used
Number 8.
Scroll
move.
To move from left to right we can hold control and use the scroll wheel to go up and down
to move left and right.
If you hold control and move down you will move right and if you hold
control and move up with the scroll wheel you will go left.
To move up and down we hold shift and
use the scroll wheel to go up and down.
Number 7.
Next up we have a quick little shortcut to create
a new layer.
If you hold control,
hold shift and end you get yourself a new layer.
This can save
you some time from going to the icon at the bottom. our clipping path services company top shortcut used
Number 6.
Using the pencil we can hold control
and click anywhere on the screen to get yourself a straight line.
This will automatically make the line
straight so you can either have it at 90 degrees or you can have it at zero.
You can also have it
between 45 degrees and this will make it straight automatically.
It will lock it and whichever one
it’s the closest to that’s the one that it will make.
So if it’s closer to the 90 you will make it at 90. our clipping path services company top shortcut used
Number 5.
This shortcut is one of my personal favorites.
I use it all the time.
No matter if you’re
on a laptop or computer,
you can use it.
We use the square brackets on our keyboard to make the size
of the brush or any of the adjustments to the size.
You can use the first one to make it smaller
and the second one to make it larger. our clipping path services company top shortcut used
Number 4.
Moving on to the next one we have the same shortcut but
this time we are going to use our mouse to adjust the size and also the hardness of the brush.
You want
to hold alt and right click and drag it to the right or down.
If you drag it out to the right you
change the size of it.
If you drag it down you change the hardness. our clipping path services company top shortcut used
Number 3.
Next up we have one of the most
used shortcuts that I use personally myself and I can imagine a lot of you would use and that is
control and j.
Control and j duplicates the layer so you get yourself a copy of the layer which
was liked.
Number 2.
The second most useful shortcut in Photoshop definitely has to be the zoom tool.
The zoom tool allows us to zoom into the little detail and zoom out once we are done editing the
small detail.
By holding alt and using the scroll wheel you can zoom up by scrolling up and scrolling down
to zoom out. our clipping path services company top shortcut used
Number 1.
And finally we get to number 1.
Number 1 definitely has to be on
do because let’s be honest we all make low mistakes and to correct the low mistakes we press
control alt and z to undo if you are on windows and for a Mac it is control command and z.
You can also
redo by pressing control and z and this is my top 10 Photoshop shortcut. our clipping path services company top shortcut used
More helpful videos click here